Okay, friend – if you love flea market finds and tiny weekend projects, this roundup of vintage home diy ideas is for you. I get so giddy about transforming thrifted pieces into cozy corners, and I swear small changes make a room feel lived-in and personal.
I wrote this because I wanted a single place to keep the little tricks that actually worked for me after months of trial and error. You’ll find beautiful, budget-friendly projects that feel intentional, not cluttered.
Read on and you’ll walk away with 12 practical projects and styling tips you can start this weekend.
12 Vintage Home DIY Ideas to Refresh Your Space
Cozy Reading Nook Refresh
This is one of my favorite quick wins because a chair, a small shelf and a few plants can change the whole vibe of a room in an afternoon. Start by scouring thrift stores for a chair with good bones and reupholster or paint the legs to match your palette, and then layer in books and a soft throw for an inviting look. You’ll love how adding a little greenery and a warm lamp makes the space feel like an intentional reading corner rather than an afterthought.
Stacked Book Styling
Stacking vintage and worn books on a wooden table is one of the easiest vintage home diy touches and it looks designed without fuss. I once leaned into a full vintage books phase and learned that mixing sizes and adding a small plant or brass object on top keeps stacks from feeling messy. Try grouping three to five books and topping the pile with a candle or ceramic trinket to create instant character.
Old Door Repurpose
An old white door is such a tactile, story-filled piece that can become a statement headboard or leaning room divider with minimal effort. First, sand and clean the door, then decide whether to leave the patina for authenticity or repaint lightly to show the grain through; either choice reads vintage and curated. You can also add hooks or shelves to turn it into an entryway organizer that both looks charming and performs well for everyday use.
Rustic Bathroom Details
Small, thoughtful details like a wooden toilet paper holder or reclaimed wood shelf make a bathroom feel intentionally vintage rather than dated. Start with warm woods and simple hardware, and pair them with creamy tiles or soft paint to keep the look fresh and modern. When I swapped out a plastic holder for a simple wooden frame, the whole bathroom felt like a mini renovation for almost no money.
Vintage Kitchen Touches
Add personality to your kitchen with retro knobs, an enamelware collection, or open shelving that shows off well-loved plates and jars. Think about subtle swaps – new hardware, a vintage clock, or a thrifted mixing bowl – which instantly read as intentional styling rather than clutter. If you’re nervous about committing, I suggest starting with one small change and living with it for a week to see how it fits your daily routine.
Candlelit Table Styling
A trio of colorful vintage candles or mismatched candlesticks on a wooden table gives an effortless nostalgic glow that feels both romantic and lived-in. Select colors that complement your existing textiles and mix heights for visual interest, then surround them with small elements like a saucer or seed packet for depth. Lighting is a mood-maker, and switching to softer bulbs or candlelight instantly softens a space without major effort.
Swap Small Hardware
Changing out light switch plates, knobs, and pulls is a tiny project that pays off big in a vintage home diy refresh, because those small details create cohesion across rooms. Pick metallics like brass or aged gold for instant warmth, and don’t be afraid to mix finishes carefully for an eclectic feel. I remember replacing all the plastic switch plates in my apartment and feeling like I’d leveled up the whole place for under twenty dollars.
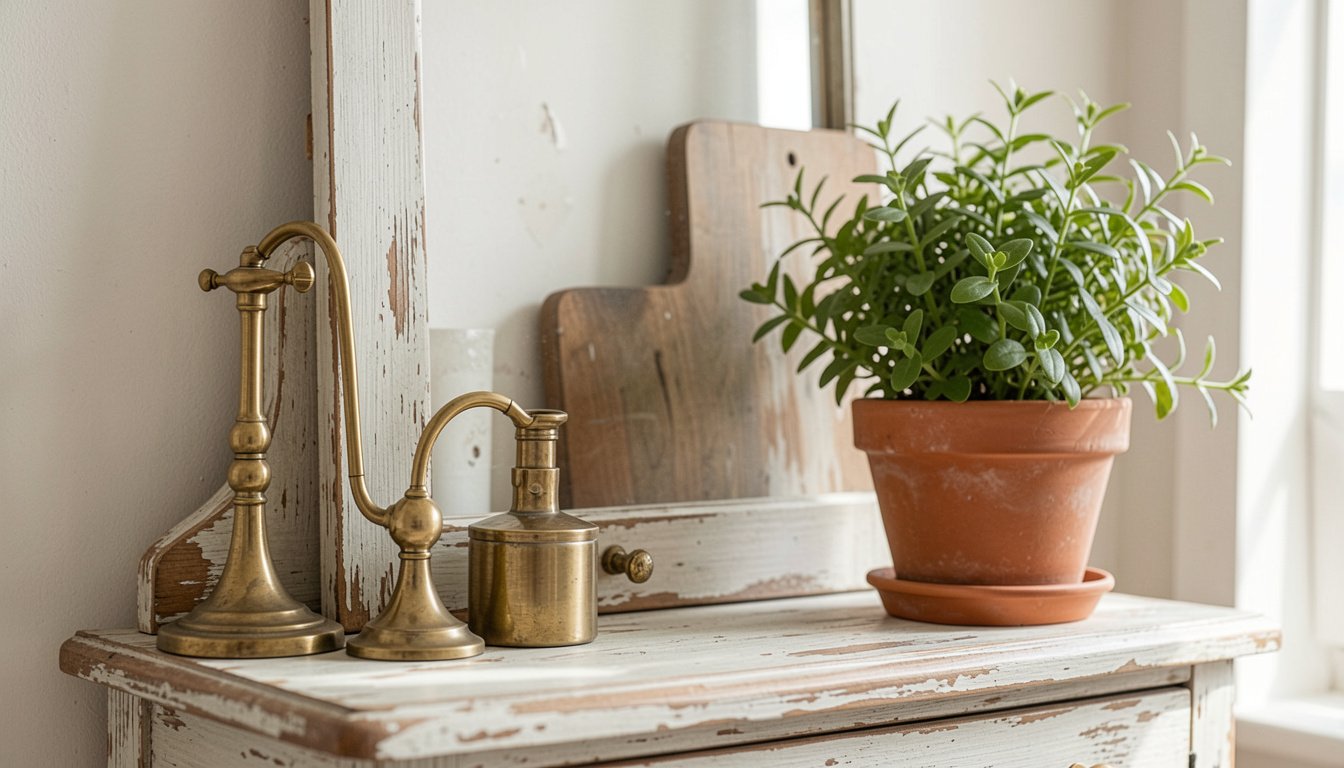
Makeup Corner Upgrades
Vintage vases or jars become perfect organizers for brushes and tools, and a framed mirror with patina ties the look together while keeping the counter tidy. Group items on a small tray to contain visual clutter, and add a small plant or a stack of tiny books to pull the vignette into the room. You’ll find that function and style rarely have to be at odds when you think in layers and textures.
Tabletop Gallery Vignette
A worn wooden table with a couple of framed vintage photos creates an instant focal point that feels curated yet casual, perfect for an entry or hallway. Start with two frames of different sizes and lean them rather than hanging, then add a low bowl or stack of postcards to complete the vignette. Changing this arrangement seasonally is a joy and makes the display feel fresh without extra purchases.
Mirror and Tea Styling
Styling a mirror with a small tea set and a few ceramics is an easy way to add layered interest to a wall or shelf and it feels like a cozy invitation into your home. Choose a mirror with an aged frame and keep the tea set visible but not crowded, using negative space for elegance. Placing this vignette near natural light will highlight the textures and make antiques sing in a fresh way.
Weathered Frame Refresh
Sometimes leaving a frame slightly imperfect is the point – the chipped paint and uneven tones tell a story and anchor a room with authenticity. Consider cleaning the glass and backing, then swapping in a modern print or pressed flower to bridge old and new styles. I rescued a pair of spider-webbed frames from a thrift bin and watched them become the most complimented pieces in my living room once I rehung them with fresh art.
Tiny Textile Art
Cross stitch and small textile pieces are such approachable vintage home diy projects because they add softness and a handmade feel to walls without overwhelming space. Start with one or two small framed pieces and hang them at eye level in a simple grid or asymmetrical cluster for charm. You can stitch something personal or shop local makers to support artisans while keeping the look authentically vintage.
How to Actually Make This Work For You
Start with a single room and pick three elements to change – surface, hardware, and a small decorative object – so the project feels manageable and you see instant results. Trust your instincts by mixing inexpensive thrifted items with one or two pricier pieces you truly love, and keep a running inspiration folder so you can revisit ideas when you get stuck. Finally, set aside a weekend to finish one vignette from start to polish so you feel the payoff and gain momentum for the next project.
How do I start a vintage home DIY project?
Begin small by choosing one piece or area to refresh – a nightstand, shelf, or entryway wall – and collect a few inspiration images, then plan materials and a realistic weekend timeline. Focus on one actionable change so you avoid decision fatigue and actually finish something you love.
Are vintage DIY projects expensive?
They can be very affordable if you shop secondhand, repurpose what you already own, and prioritize a few statement updates rather than buying new everything. Small swaps like hardware, paint, or textiles often deliver the most impact for the least money.
How do I know what to keep versus toss?
Keep items with good bones, sentimental value, or unique character and pass along pieces that feel like clutter rather than personality. If you’re unsure, try staging the item in a vignette for a week to see if it still sparks joy.
Can I mix vintage with modern decor?
Absolutely – blending eras creates a collected, layered look that feels personal and current, and pairing a modern sofa with vintage side tables keeps the room from looking like a set. Aim for harmony through color and texture rather than strict matching.